Basic
Walkthrough Oracle Part-5
In this part we will study some more useful database objects. For
example, VIEWS, TRIGGERS, PROCEDURES and few other.
As we had an introduction to trigger creation in part 2, we will
discuss how we run scripts first. Oracle supports different kind of scripts. You
can run system shell scripts (.bat, .cmd, .js, .vbs,.sh and many more). Let us try to understand how we can run
scripts. Simple SQL script looks like
Create a file with .sql extension and save it on the disk. Then run
it with ‘@’ prefix.
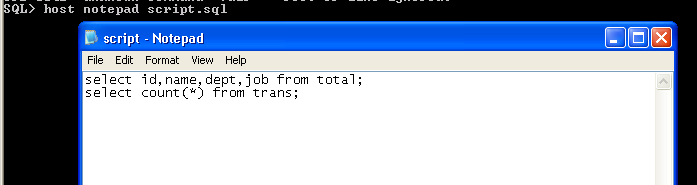 |
|
host
notepad script.sql ; @script.sql ; |
|
select
id,name,dept,job from total; select count(*)
from trans; |
|
WEEKNUM INCOME EXPENSE ---------- ---------- ----------
32 224.2 49.4 COUNT(*) ---------- 5 |
This was a simple SQL script. This is to
be run in command window. The syntax has been indicated in blue. Being an
example script, I just listed few commands. In actual scripts these lines are
usually over hundreds. Scripts can also be invoked in verbose mode
(as echo on in DOS).
|
C:\Documents
and Settings\sgill>echo.quit;|sqlplus -s user1/password1 @script2.sql |
|
set lines 200; select
weeknum,income,expense, timeupdate from total; |
 |
This is not
a common way, but with each script sqlplus will quit its shell as it encounters
‘quit’. So, feeding inline quit command to sqlplus takes effect after the
execution of the script is completed.
The
scripts are usually written for various tasks including generating daily
reports. As a rule of thumb, add all the commands to script file that are to be
repeated in future and invoke the script using one of above syntaxes.
Let
us create another trigger on TRANS table (created in part 2) to ensure that
user uses in or out keywords only in code column. Using anything else will be
waste of data. So, we will try to reject entry if the code is not set properly.
|
sqlplus
-S user1/password1 @trig2.sql |
|
CREATE OR
REPLACE TRIGGER Check_Code BEFORE INSERT ON TRANS FOR EACH ROW BEGIN IF (upper(:NEW.CODE)<>'IN' AND
upper(:NEW.CODE)<>'OUT') THEN raise_application_error (-20100, 'Code
must be either "in" or "out"'); END IF; END; / quit; |
 |
This
trigger will stop us from entering wrong ‘Code’
in TRANS table. This is to ensure that data entered will be usable by the
trigger update_total trigger to update TOTAL tables.
|
set lines
200; select *
from total |
|
WEEKNUM INCOME EXPENSE TIMEUPDATE ---------- ---------- ----------
--------------------------------------------------------------------------- 32 224.2 49.4 19-08-06 08:11:27.826000 |
|
insert into
TRANS values (6, 120.00,'EN'); |
|
insert into TRANS values (6, 120.00,'EN') * ERROR at line 1: ORA-20100: Code must be either
"in" or "out" ORA-06512: at
"USER1.CHECK_CODE", line 4 ORA-04088: error during execution
of trigger 'USER1.CHECK_CODE' |
|
insert into
TRANS values (6, 120.00,'In'); |
|
1 row created. |
|
select *
from total |
|
WEEKNUM INCOME EXPENSE
TIMEUPDATE ------- -------- --------
------------------------ 32 344.2
49.4 19-08-06 11:53:30.972000 |
Cool,
the transaction was applied to TOTAL table when we entered the correct code.
Remember we had used ‘case free’ iN and OuT key words. It will work with any case.
Let
us try to have some flavor of VIEWS. As
explained earlier the VIEW is combination of columns from different tables. We
will create another table called PERSONS with names of all family members. Then
we will create a view joining TRANS and PERSONS tables to save info about who
had carried out the transaction. For this purpose, we will add a column PID to
TRANS table.
|
alter table TRANS add PID CHAR(2) |
|
Table altered. |
Now create table PERSONS as below.
|
create table PERSONS (PID CHAR(2) not
null primary key, FNAME CHAR(16), LNAME CHAR(12)) |
|
Table created. |
Add some data to the table.
|
insert into PERSONS values (‘00’,’David’,’Boon’); 1 row created. insert into PERSONS values
(‘01’,’Marry’,’Boon’); 1 row created. insert into PERSONS values
(‘02’,’John’,’Boon’); 1 row created. select * from persons; PID FNAME LNAME --- ----------------
------------ 00 David Boon 01 Marry Boon 02 John Boon |
Now we need to enter these PID in TRANS
table to indicate who carried the transactions out. Let’s do that.
|
select
* from TRANS; ID
AMOUNT CODE PI ----------
---------- ---- -- 1
123.45 in 2 34.4 out 3 100 in 4 15 out 5 .75 in 6 120 In 6 rows
selected. update
TRANS set PID='00' where ID=1; 1 row updated. update
TRANS set PID='01' where ID=2; 1 row updated. update
TRANS set PID='00' where ID=3; 1 row updated. update
TRANS set PID='02' where ID=4; 1 row updated. update
TRANS set PID='02' where ID=5; 1 row updated. update
TRANS set PID='00' where ID=6; 1 row updated. select
* from TRANS ID
AMOUNT CODE PI ----------
---------- ---- -- 1
123.45 in 00 2 34.4 out 01 3 100 in 00 4 15 out 02 5 .75 in 02 6 120 In 00 6 rows
selected. |
Now
we can create a view name trans_view to reflect name of the person instead of
PID. PID is usually handy for use with managing multiple tables within
database. Views are very handy and useful for creating end-user reports.
---------- ---- ---------------- ------------
123.45
in David Boon
34.4
out Marry Boon
100
in David Boon
15
out John Boon
.75
in John Boon
120
In David Boon
6 rows selected.
|
CREATE VIEW
trans_view as SELECT t.AMOUNT,t.CODE,p.FNAME,p.LNAME from TRANS t, PERSONS p
where p.PID=t.PID ; View created. select *
from trans_view; AMOUNT CODE FNAME LNAME ---------- ---- ---------------- ------------ 123.45 in David Boon 34.4 out Marry Boon 100 in David Boon 15 out John Boon .75 in John Boon 120 In David Boon 6 rows selected. |
So,
we had an idea how Views work. In actual
practice, the views are rarely so simple. But the logic behind a view is always
the same. JOIN tables to appear like one table. Please note that for simplicity
of examples, we did not use TIMESTAMP column in TRANS table, which is mostly
used to keep track of transaction along with some other more useful info.
For simplest use of database system,
we have already covered most objects. In actual usage I hardly need anything
other than what we have covered so far. The other objects are for some more
sophisticated actions. For example, PROCEDURES and FUNCTIONS are very useful
but for the scope of this tutorial these will be covered in last parts.
Let’s discuss some of useful built-in functions.
LOWER
All the letters converted to lowercase.
UPPER
All the letters in converted to uppercase.
LTRIM
All spaces removed from the left.
RTRIM
All spaces removed from the right.
SUBSTR
Returns 'n' number of characters from string starting
from the 'm' position.
LENGTH
Number
of characters in string is returned.
TO_CHAR(datetime)
TO_CHAR
(datetime) function returns a datetime or interval value of DATE. TIMESTAMP,
TIMESTAMP WITH TIME ZONE.
CURRENT_TIMESTAMP
The CURRENT_TIMESTAMP() function returns the current date and time
in the session time zone, in a value of datatype TIMESTAMP WITH TIME ZONE.
SYSTIMESTAMP
The SYSTIMESTAMP
function returns the system date, including fractional seconds and time zone.
RAWTOHEX
Converts
raw to a character value containing its hexadecimal equivalent. The raw
argument must be RAW datatype.
TO_CHAR
Converts
Numeric and Date values to a character string value. It cannot be used for
calculations since it is a string value.
TO_DATE
Converts a
valid Numeric and Character values to a Date value. Date is formatted to the
format specified by 'date_format'.
ABS (x)
Absolute
value of the number 'x'
CEIL (x)
Integer value
that is Greater than or equal to the number 'x'
FLOOR (x)
Integer value
that is Less than or equal to the number 'x'
MOD
returns the remainder of n2 divided by n1.
Returns n2 if n1 is 0.
CHR
returns the
character having the binary equivalent to n as a VARCHAR2 value in either the
database character set or, if you specify USING NCHAR_CS, the national
character set.